目录
安装
官方提供了二进制文件: https://github.com/seaweedfs/seaweedfs/releases
比如目前最新版本的: https://github.com/seaweedfs/seaweedfs/releases/download/4.13/linux_amd64.tar.gz
下载解压后,得到 weed 二进制可执行文件,移动到
/usr/local/bin/
,通过以下命令查看是否安装成功:
test@debian-elk:~$ weed version
version 30GB 4.13 63f641a6c9e6ee7e1fec417cabba4edf88cebc53 linux amd64

For enterprise users, please visit https://seaweedfs.com for SeaweedFS Enterprise Edition,
which has a self-healing storage format with better data protection.
服务
weed 的服务有几个部分组成:
- master:管理整个集群拓扑,作为调度中心,端口:9333
- volume:负责控制文件存储,端口:8080
- filer:提供文件路径、目录结构等抽象功能,端口:8888
- s3:提供 AWS S3 的支持,端口:8333
每个服务可以单独启动,也就是多个 service 文件,这样的好处是方便横向扩展,一个服务挂了不影响另外一个服务,具体步骤和 service 文件可以参考: https://blog.csdn.net/weixin_51476622/article/details/148948939
我这里作为演示,以上几个服务都放在一个 service 中启动:
/etc/systemd/system/seaweedfs.service
[Unit]
Description=SeaweedFS Server
After=network.target

[Service]
Type=simple
User=test
Group=test

ExecStart=/usr/local/bin/weed server \
  -dir=/data/seaweedfs \
  -ip=0.0.0.0 \
  -master.port=9333 \
  -volume.port=8080 \
  -filer=true \
  -filer.port=8888 \
  -s3 \
  -s3.port=8333 \
  -s3.config=/etc/seaweedfs/s3.json

Restart=always
RestartSec=5
LimitNOFILE=65536

[Install]
WantedBy=multi-user.target
这里我通过
-s3.config
指定了 s3 的配置文件
/etc/seaweedfs/s3.json
{
  "identities": [
    {
      "name": "admin_user",
      "credentials": [
        {
          "accessKey": "admin",
          "secretKey": "admin"
        }
      ],
      "actions": [
        "Admin",
        "Read",
        "Write",
        "List",
        "Tagging"
      ]
    },
    {
      "name": "readonly_user",
      "credentials": [
        {
          "accessKey": "readkey1",
          "secretKey": "readsecret1"
        }
      ],
      "actions": [
        "Read",
        "List"
      ]
    }
  ]
}
启动
sudo systemctl daemon-reload
sudo systemctl enable seaweedfs.service
sudo systemctl start seaweedfs.service
sudo systemctl status seaweedfs.service
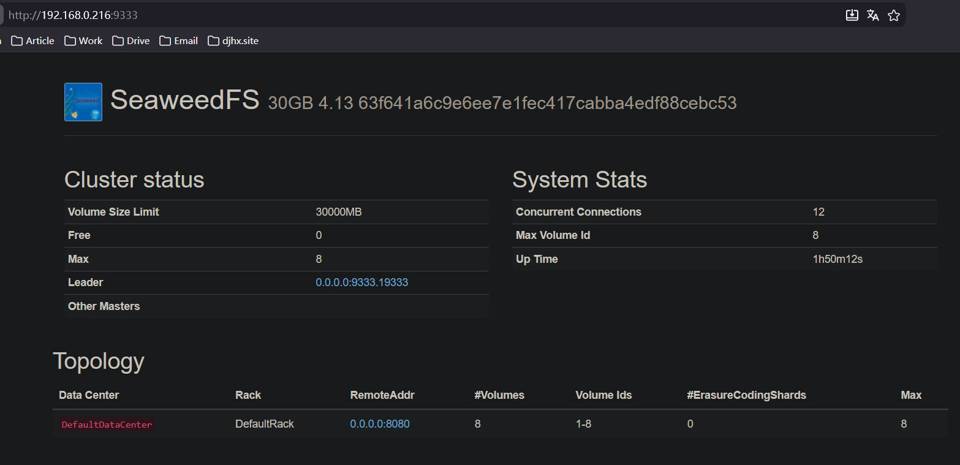
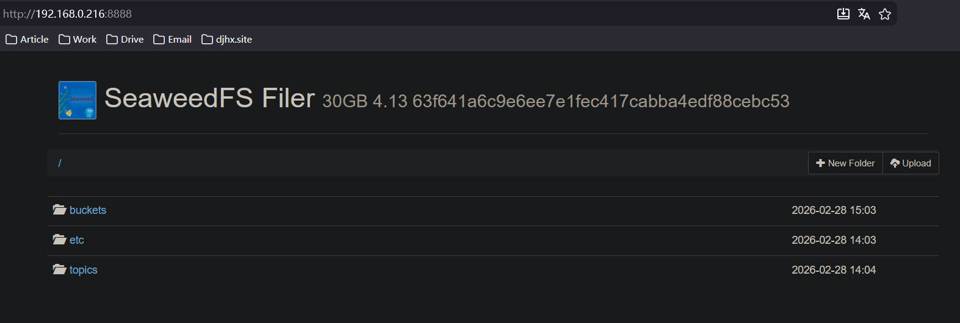
启动成功后,可以访问对应服务端口的 web 页面:
master:
filer:
使用
blob API
SeaweedFS 提供了一套 HTTP API 用来管理对象,这里以上传、查看、删除一个图片文件为例。
第一步,通过 HTTP GET(或者 PUT、POST)请求 master 服务的
/dir/assign
接口获取 fid:
curl http://localhost:9333/dir/assign
{"count":1,"fid":"3,01637037d6","url":"127.0.0.1:8080","publicUrl":"localhost:8080"}
第二步,上传,通过 HTTP POST(multipart/form-data)到 volume 服务的
url + '/' + fid
接口,就上传成功了:
curl -F file=@/home/chris/myphoto.jpg http://127.0.0.1:8080/3,01637037d6
{"name":"myphoto.jpg","size":43234,"eTag":"1cc0118e"}
第三步,查看,通过 HTTP GET volume 服务的
url + '/' + fid
接口:
curl http://127.0.0.1:8080/3,01637037d6
第四步,删除,通过 HTTP DELETE volume 服务的
url + '/' + fid
接口:
curl -X DELETE http://127.0.0.1:8080/3,01637037d6
S3
SeaweedFS 支持 S3 接口,这里用 aws CLI 演示,首先确保安装好 aws CLI:
curl "https://awscli.amazonaws.com/awscli-exe-linux-x86_64.zip" -o "awscliv2.zip"
unzip awscliv2.zip
sudo ./aws/install
aws 配置用户名和密码,就是刚刚的
s3.json
里配置的用户:
aws configure

AWS Access Key ID [None]: admin
AWS Secret Access Key [None]: admin
Default region name [None]: us-east-1
Default output format [None]: json
列出 bucket:
aws --endpoint-url http://localhost:8333 s3 ls
创建 bucket:
aws --endpoint-url http://localhost:8333 s3 mb s3://docs
列出某个 bucket 中的文件:
aws --endpoint-url http://localhost:8333 s3 ls docs
上传文件:
aws --endpoint-url http://localhost:8333 s3 cp ./test.jpg s3://docs/images/test.jpg
下载文件:
aws --endpoint-url http://localhost:8333 s3 cp s3://docs/images/test.jpg ./download.jpg
删除文件:
aws --endpoint-url http://localhost:8333 s3 rm s3://docs/images/test.jpg